

Note: This guide is for APU-issued Mac devices only. You will need the Self Service app, which is only available on APU-issued Mac devices.
1. Open the Self Service app
Look for the Self Service icon in your Dock. If you don't see it there, you can find it using Spotlight Search — press Command + Spacebar, then type Self Service and press Enter.

2. Click on the “Printers” category
Select Printers from the category list on the left side of the app. This will display all printers available to you.
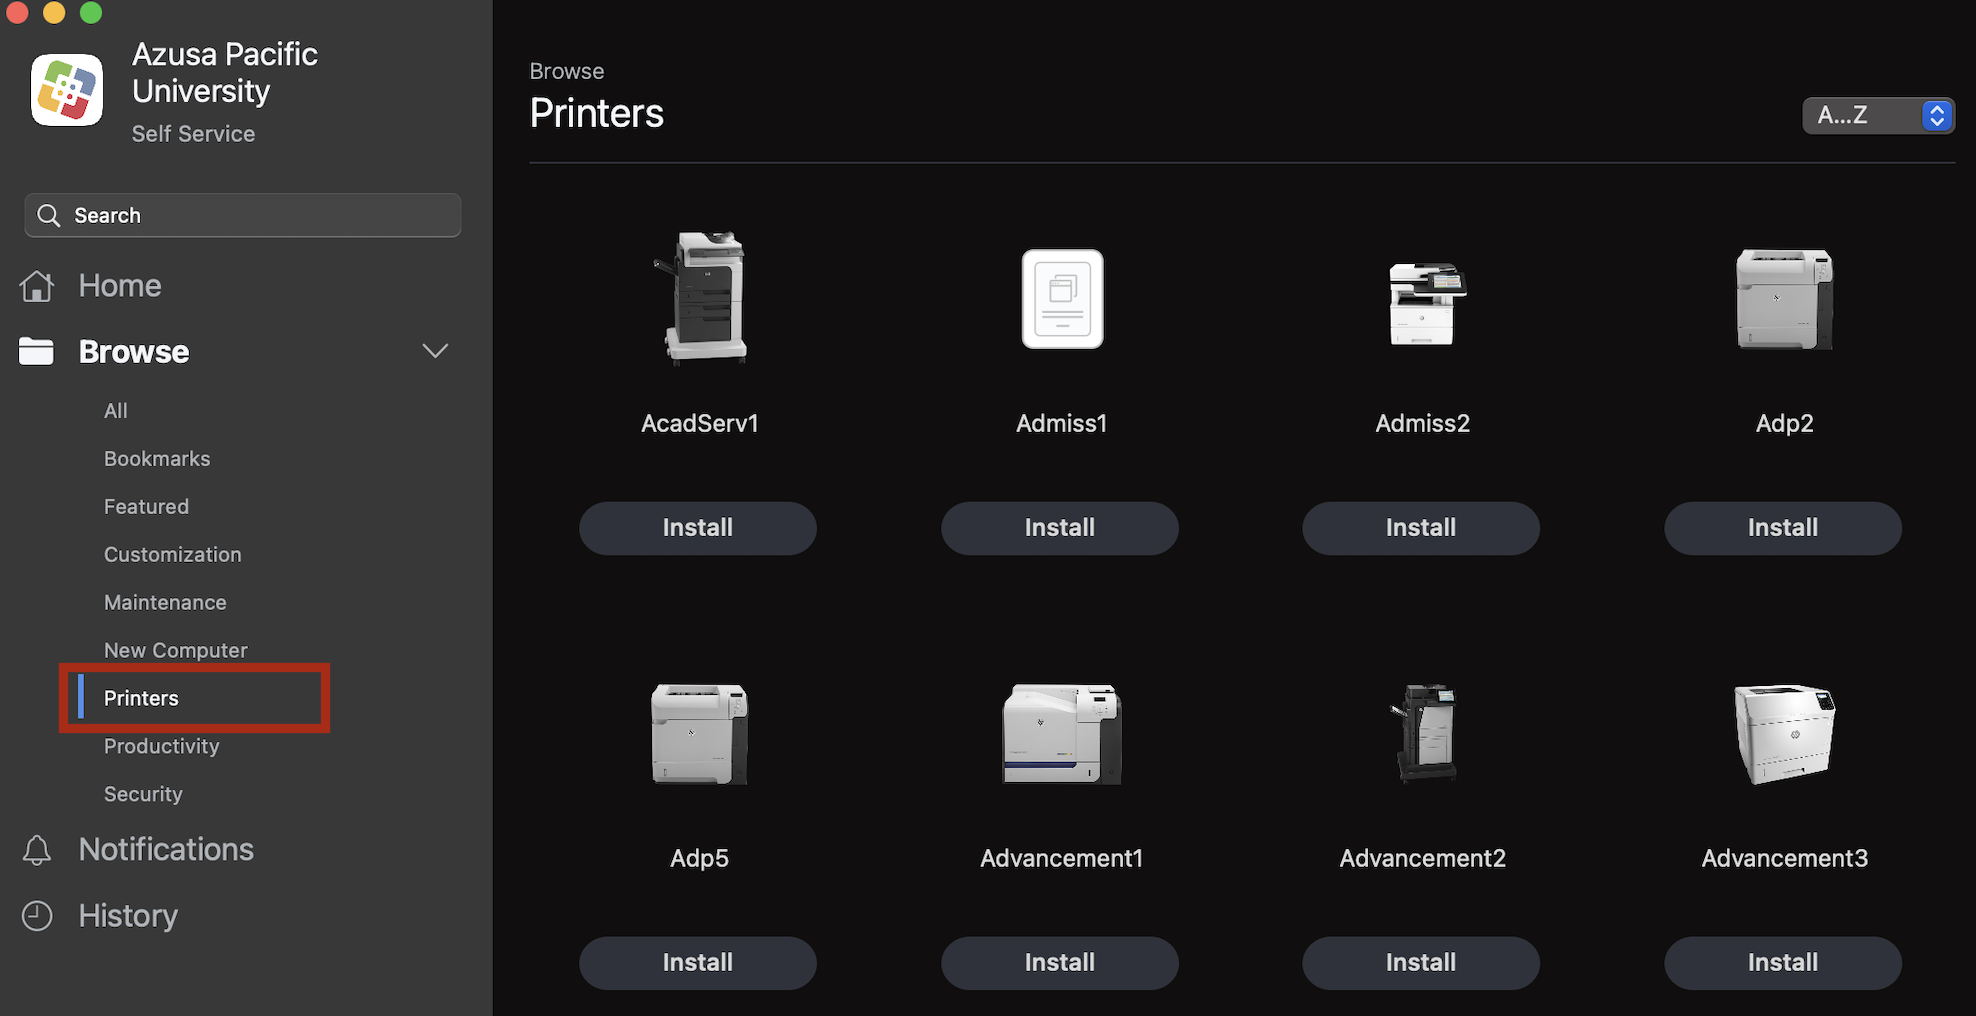
3. Find and install your printer
Scroll through the list to find the printer you need, then click on it to install. You can also use the search box on the left side to search by printer name.
- The printer name is printed on a label on the physical device.
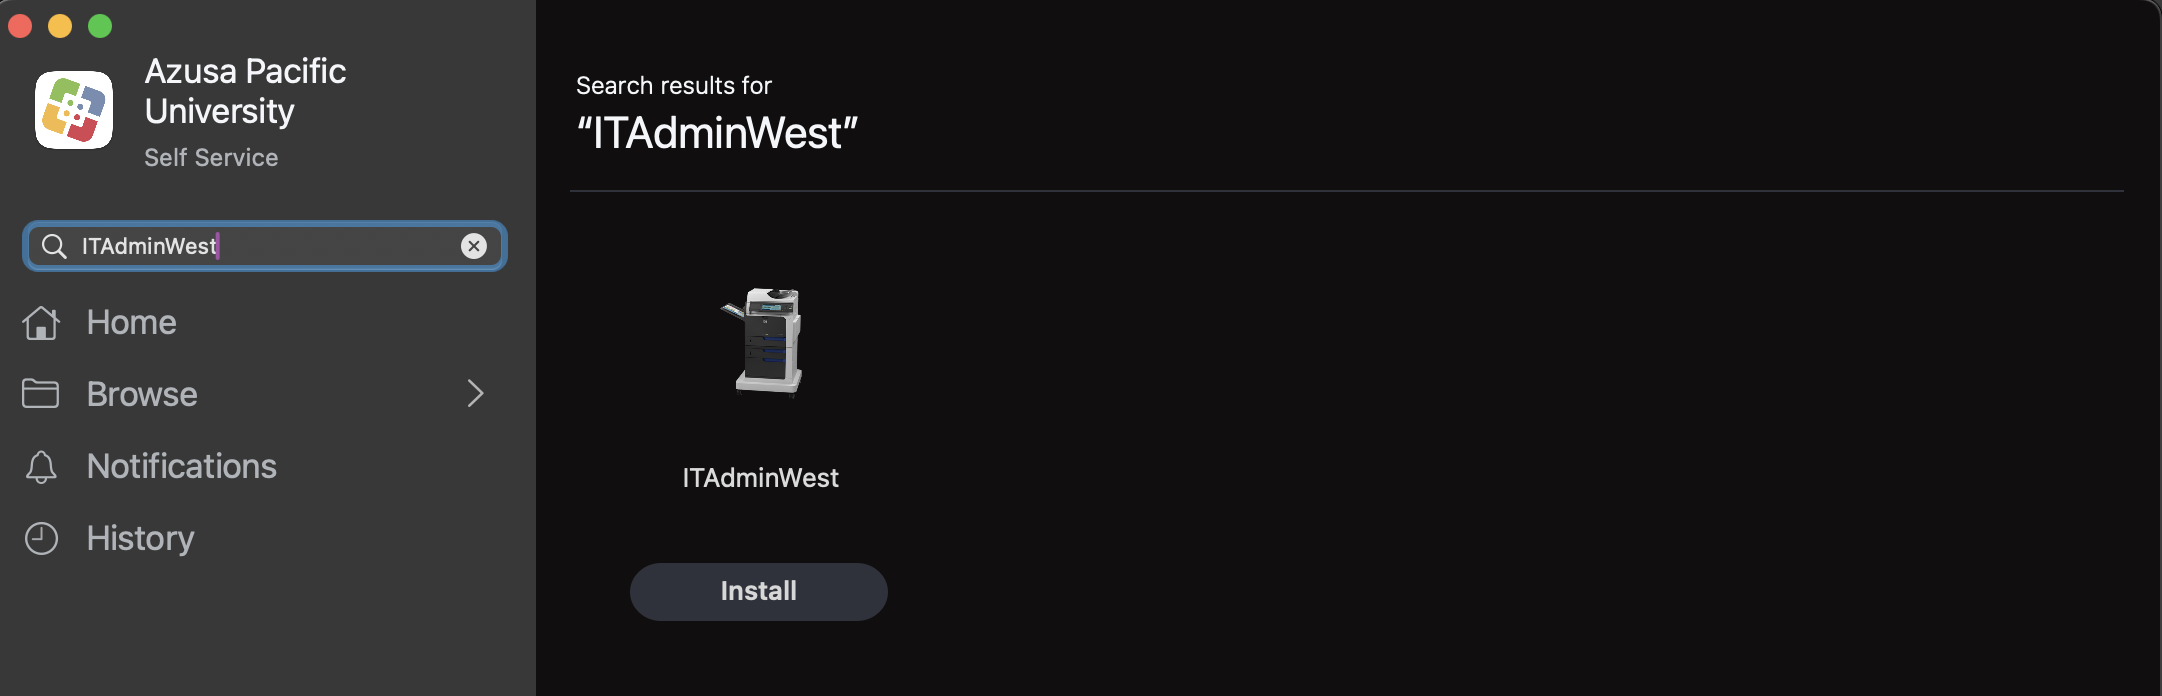
That’s it — you’re done!
If your printers are not showing up, try quitting the app (Command + Q) and reopening it. If you are unable to find the printer you need or something doesn’t seem to be working, email us at [email protected]!